🔧 1. Shortcode-Funktion in functions.php registrieren
// kontaktformular per shortcode laden
function mein_kontaktformular_shortcode() {
    ob_start();
    require get_stylesheet_directory() . '/parts/php/kontaktformular.php'; // Pfad anpassen
    return ob_get_clean();
}
add_shortcode('kontaktformular', 'mein_kontaktformular_shortcode');
📌 Was das macht:
- Gibt deren Inhalt zurück, wenn du
[kontaktformular]im Editor verwendest. - Lädt die Datei
kontaktformular.phpaus dem Unterordner/parts/php/deines Child-Themes.
🎨 2. CSS-Datei einbinden (contact.css)
function kontaktformular_styling() {
    wp_enqueue_style(
        'kontaktformular-style',
        get_stylesheet_directory_uri() . '/custom-styles/contact.css' // Pfad zur CSS-Datei
    );
}
add_action('wp_enqueue_scripts', 'kontaktformular_styling');
📌 Hinweis:
Lege die Datei contact.css im Verzeichnis /custom-styles/ deines Child-Themes an.
3. Datei kontaktformular.php in /parts/php/ anlegen
<?php
$empfaenger = 'info@example.com'; // E-Mail-Adresse des Admins

$fehler = '';
$erfolg = '';

if ($_SERVER["REQUEST_METHOD"] === "POST" && isset($_POST['kontaktseite_nonce']) && wp_verify_nonce($_POST['kontaktseite_nonce'], 'kontaktformular_absenden')) {
    $vorname = sanitize_text_field($_POST['vorname']);
    $nachname = sanitize_text_field($_POST['nachname']);
    $email = sanitize_email($_POST['email']);
    $nachricht = sanitize_textarea_field($_POST['nachricht']);

    if (empty($vorname) || empty($nachname) || empty($email) || empty($nachricht)) {
        $fehler = 'Bitte füllen Sie alle Pflichtfelder aus.';
    } elseif (!is_email($email)) {
        $fehler = 'Bitte geben Sie eine gültige E-Mail-Adresse ein.';
    } else {
        $betreff = 'Kontaktformular-Anfrage von ' . $vorname . ' ' . $nachname;
        $inhalt = "Vorname: $vorname\nNachname: $nachname\nE-Mail: $email\nNachricht:\n$nachricht";
        $headers = [
            'Content-Type: text/plain; charset=UTF-8',
            "From: $vorname $nachname <$email>"
        ];

        // Bestätigung an den Absender
        $confirmation_subject = 'Bestätigung: Ihre Nachricht wurde erfolgreich gesendet';
        $confirmation_body = "Hallo $vorname,\n\nvielen Dank für Ihre Nachricht. Wir melden uns bald bei Ihnen.\n\nIhre Nachricht war:\n$nachricht";
        wp_mail($email, $confirmation_subject, $confirmation_body, $headers);

        // Mail an Admin
        if (wp_mail($empfaenger, $betreff, $inhalt, $headers)) {
            wp_safe_redirect(home_url('/danke/'));
            exit;
        } else {
            $fehler = 'Beim Senden ist ein Fehler aufgetreten.';
        }
    }
}
?>
Ergänze die Datei kontaktformular.php ganz unten um folgenden Html-Code. :
<div class="kontaktformular">
    <h1>Kontaktformular</h1>

    <?php if ($fehler): ?>
        <p style="color:red;"><?php echo esc_html($fehler); ?></p>
    <?php endif; ?>

    <?php if ($erfolg): ?>
        <p style="color:green;"><?php echo esc_html($erfolg); ?></p>
    <?php endif; ?>

    <form action="<?php echo esc_url(get_permalink()); ?>" method="post">
        <?php wp_nonce_field('kontaktformular_absenden', 'kontaktseite_nonce'); ?>

        <p>
            <label for="vorname">Vorname*:</label><br>
            <input type="text" name="vorname" id="vorname" required>
        </p>

        <p>
            <label for="nachname">Nachname*:</label><br>
            <input type="text" name="nachname" id="nachname" required>
        </p>

        <p>
            <label for="email">E-Mail*:</label><br>
            <input type="email" name="email" id="email" required>
        </p>

        <p>
            <label for="nachricht">Nachricht*:</label><br>
            <textarea name="nachricht" id="nachricht" rows="5" required></textarea>
        </p>

        <p>
            <button type="submit">Absenden</button>
        </p>
    </form>
</div>
4. CSS für contact.css erstellen
.kontaktformular {
  max-width: 600px;
  margin: 0 auto;
  padding: 2rem;
  background-color: #f9f9f9;
  border-radius: 12px;
  box-shadow: 0 4px 12px rgba(0, 0, 0, 0.1);
  font-family: system-ui, sans-serif;
}

.kontaktformular h1 {
  text-align: center;
  font-size: 1.75rem;
  margin-bottom: 1.5rem;
  color: #333;
}

.kontaktformular label {
  display: block;
  margin-bottom: 0.25rem;
  font-weight: 600;
  color: #444;
}

.kontaktformular input,
.kontaktformular textarea {
  width: 100%;
  padding: 0.75rem;
  margin-bottom: 1rem;
  border: 1px solid #ccc;
  border-radius: 8px;
  font-size: 1rem;
  box-sizing: border-box;
}

.kontaktformular textarea {
  resize: vertical;
  min-height: 150px;
}

.kontaktformular button {
  background-color: #0073aa;
  color: #fff;
  border: none;
  cursor: pointer;
  font-weight: bold;
  padding: 0.75rem 1.5rem;
  border-radius: 8px;
  font-size: 1rem;
  transition: background-color 0.3s ease;
}

.kontaktformular button:hover {
  background-color: #005f8d;
}
5. Formular in Gutenberg einfügen
- Öffne deine Seite „Kontakt“ im Block-Editor (Gutenberg).
- Füge einen „Shortcode“-Block ein.
- Trage dort den Shortcode ein:
[kontaktformular]
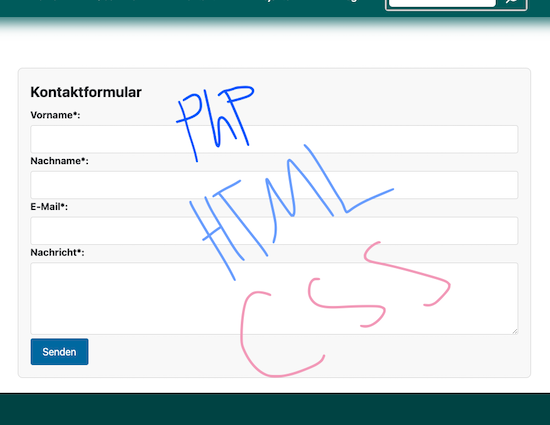
✅ Ergebnis
- Kontaktformular wird auf der Seite angezeigt.
- E-Mails gehen an den Website-Betreiber und eine Bestätigung an den Absender.
- Nach Absenden erfolgt eine Weiterleitung zur Danke-Seite (
/danke/– du musst diese Seite anlegen!).
🔒 Sicherheitshinweis
- Durch
wp_verify_nonceist das Formular vor CSRF-Angriffen geschützt. - Mit
sanitize_…()werden alle Eingaben gesichert verarbeitet.
Leave a Reply